Fried Cauliflower (An attempt towards Cauliflower Pakora)

I tried. It made something enjoyable.

The Recipe:

Vegan Fritter Recipe

Additional Ingredients:

1 head cauliflower

1/2 cup flour

Procedure:

Follow the recipe for the Fritter up until the frying.

Cut the cauliflower into bite sized florets and roll in a large bowl with the flour.  This will help the batter stick to the cauliflower.

Dip the flour coated florets into the batter and lightly place into the pan with hot oil. I always tried to keep them from sticking to one another for the first minute or so, but then it’s fine. Try to flip them if you can, sometimes they’ll just roll back over. They’re done when they’re golden brown. I took them out with a slotted spoon and placed on a paper towel lined plate. (If you have a good suggestion to take the paper towels out of the recipe, I’d love to hear it.)

This process can take a while but it’s worth it. Try not to eat the whole set in under an hour, you’ll probably be over filled. I know I was, but they were too good.

Shopping List:

  • 1 cup water
  • 1 cup split red lentils
  • ½ medium onion (I used leek again, working my way through what I had.
  • 8-10 sprigs chives (I used two scallions. “Most folks call ’em green onions but they’re really scallions.” If you can name that quote, we’ll be friends.)
  • ½ tsp salt
  • ¼ tsp pepper
  • Oil for frying
  • ¼ cup vegan mayo (For a dipping sauce if you like)
  • ¼ tsp chipotle powder (Also for the sauce)

My Story:

Think back with me to Hugo’s Restaurant in the LA area circa 2013. The first time I tried their Cauliflower Pakora. Thank you for this introduction, Amanda. I’ve thought about trying to recreate it every time I’ve seen the fluffy white vegetable.

Well, I’ve tried again. Somewhat unsuccessfully. But I’ve found something tasty. IMG_7511

Some notes: Sometimes I go to the store and forget to buy all of the ingredients, so I sub with something (sometimes) suitable. Leeks for onions, scallions for chives. Not the same. Different tastes. But I liked it. It certainly could be much better the other way and I have no idea. Sometime I’ll try it!

Be ready for the fact that you won’t be able to cover a full head of cauliflower with the batter. I nibbled on it the whole time and still had some left over. But raw cauliflower is tasty, so I have no regrets.

I started cooking late so I took fewer photos than usual. It’s also a somewhat messy affair- dipping and frying those bite sized pieces of gold.

Just do it.

Health!

-Peter

VGF Cheez Its!

Okay. This is crazy. I couldn’t stop eating them. Make them today. Really.

Cheez Its!

Recipe:

Vegan and Gluten Free Cheez Its!

Procedure:

Just follow the darned instructions. Well written and informative. You won’t be sorry.

Shopping List:

  • 3/4 c. Bob’s Red Mill All Purpose Gluten Free Flour
  • 1/2 tsp xantham gum
  • 1 c. Daiya vegan “cheese”
  • 3 Tbs Earth Balance butter, softened
  • 1/2 tsp salt
  • 1 Tb ice water

My Story:

If you have Xantham gum on hand, you almost have no excuse not to make these.

I owed a couple of friends for a huge favor. Last time I visited them, we were at the store and one (a gluten free vegan) told me that she sorely missed Cheez Its while we were browsing the Follow My Heart market. When I got home I started looking up recipes and rN across this one. It looked a little too simple but I figured I’d try it. Oh my. I didn’t know what I was in for.

IMG_7472 Cheez Its!

When they came out of the oven, I tried one. Bad choice. I was utilizing all of my self control the rest of the time I took them off the backing sheet. I tried to tell myself that I’d just have five. Err- ten. Well, just all the broken ones. Should I break some more? No no no.
I was shipping these to my friends and I knew that the only way it would happen was if I packed that box IMMEDIATELY. And sealed it. Address and all. I would have taken it to the post office then and there but it wasn’t open at nine pm.

Make these. I know I will. Find your xantham gum at a health food store if you don’t already have some (it’s not as expensive as I expected) and grab some Daiya cheese at the store on your way home after work. You’ll probably want to make a double batch.

You’ll thank me later.

I’m finally writing and publishing this days later because I didn’t want to ruin the surprise and my mouth is watering at the thought of these. Tomorrow. I’ll make fifty batches.

Maybe they’re not the most healthy.

But we’re Cheez Its originally?

Splurge sometime.

Health!
-Peter

Garlic Pasta with Roasted Tomatoes!

Quick dinner on a weeknight?

The Recipe:

The Vegan Garlic Pasta recipe from MinimalistBaker.com

Procedure:

Follow the instructions. I didn’t change much (apart from slightly adjusting some proportions according to what I could find and what I had on hand. I used three tablespoons of chopped leeks instead of the shallots. It was nice!)

Shopping List:

  • 3 cups grape tomatoes
  • 10 ounces whole wheat pasta
  • Olive oil
  • 2 medium shallots
  • 8 large cloves garlic
  • Sea salt and black pepper
  • 3-4 Tbsp unbleached all purpose flour (or another thickener of choice)
  • 2.5 cups unsweetened plain Almond Breeze

My Story:

I looked this up a couple of weeks ago and was excited to make it. So I did!

Tomatoes!

Those of you who know me are aware of my general aversion to tomatoes. I like sauces and them being a part of things, but a fresh tomato is not my favorite ingredient, so I wanted to try something new.

IMG_7341

This turned out well! I definitely processed the sauce in a blender to get it smooth and creamy- that was a good choice. Impressively garlic-y and smooth.IMG_7351

Shells were a good choice because they picked up the sauce well. It wasn’t quite as good reheated (I had it the next day as well), but in a frying pan it was pretty tasty still. Garlic Pasta!IMG_7373

I vote- give this recipe a shot! I’ve always loved MinimalistBaker- they explain well, have great photos and great recipes, and are super helpful!

Have you tried this recipe? Do you know another recipe similar or changes to this one you like? Let me know in the comments below!

Health!

-Peter

Lah-Zan-Ya.

You, my friends, are in for a treat. Taste this!

Recipes:

Ricotta Cheese

Tomato Sauce (My favorite, I make it all the time.)

Parmesan Cheese

Lasagna Construction

Additional/Alternate Ingredients:

Vegan Cheeses (I used Follow Your Heart Mozzarella and Daiya Cheddar)

Veggie Ground (I used Trader Joes brand but I’ve also had great success with Helen’s Kitchen brand)

Procedure:

If you don’t already do this, I suggest starting out chopping and prepping everything so cooking goes smoothly. There are a lot of ingredients and recipes in this one, so be on top of your game. I’d give this a moderate difficulty just because you’re juggling so many things at once.

Press your tofu. I love this little guy: Tofu Xpress. Not very expensive and has saved me a lot of time and mess! (Thanks for the recommendation Tanya!)

Get started on your sauce and heat your veggie ground. While the tomatoes are cooking, throw together your Vegan Parmesan- it’s quick and you don’t even have to clean out your processor because you’re about to use it again!

When you finish the sauce, mix in the warmed veggie ground and set aside.

Mix up your Ricotta with your hands if you’re feeling adventurous (right McKenna?) but the back of a spoon is fine too. Just less fun. Throw a handful of each of your cheeses into this mix as well and you’re ready to assemble!

I suggest using a cast iron skillet for this- I tossed mine in the oven at 350° for about ten minutes after it was done to give it that crispiness on the top. Now the layering process is exciting. Try to get it to all fit in the skillet and not above (I was not successful) because you’re going to put a lid on it. (You read the whole recipe first, right? Whoops…)

I found that it took longer to cook than I expected, maybe half an hour. Then I threw it in the oven for a few minutes and FEASTED.

I think I ate about half of it. If you don’t want to eat more than a small piece, I suggest not tasting it.

Shopping List:

  • 1 (14-ounce) block extra firm tofu
  • 1 1/2 tablespoon tahini
  • 4 cloves garlic
  • 5 tablespoons nutritional yeast
  • Pinch of freshly ground nutmeg
  • 1 1/2 teaspoon mellow white miso
  • 1 tablespoon lemon juice
  • 2 tablespoons finely chopped shallot
  • 2 tablespoons chopped fresh parsley (I forgot this, it was fine!)
  • 1 tablespoon extra-virgin olive oil
  • 1/2 large sweet onion or 1 small yellow onion, diced (about 1 cup)
  • 3 large tomatoes, seeded and diced (about 3 cups diced)
  • 3/4 cup fresh basil leaves, minced
  • 1/4 cup oil-packed sun-dried tomatoes (about 6)
  • 1/2 teaspoon dried oregano
  • 1/4-1/2 teaspoon fine grain sea salt, to taste
  • Freshly ground black pepper, to taste
  • red pepper flakes, to taste (optional)
  • 1/2 cup toasted sesame seeds
  • 1 12 -ounce package frozen chopped butternut or winter squash, thawed
  • 1 teaspoon chopped fresh rosemary (I forgot this too, it was fine!)
  • Pinch of freshly grated nutmeg
  • 6 no-boil lasagna noodles
  • Vegan Cheeses- two handfuls

My Story:

Here’s the history of this recipe.

Today I was at the store, remembering that I had leftover squash from that pizza I made a week ago, and I needed to use it soon. A quick google search later, I had a recipe. Or, an amalgam of recipes. Anyway, grabbed a few things and headed home!

IMG_7246

I met a friend at my house as she needed a place to watch a live stream of our friend playing Roller Derby that night, so I cooked around her and a laptop in the kitchen. It was warm and nice to have company. Also- Go Smalls!

IMG_7233IMG_7228  IMG_7238 IMG_7241 IMG_7251  IMG_7253 IMG_7259

Everything went swimmingly until I snagged on the lid. My skillet lid that is supposed to fit anything between 8 and 12 inches does—If your cast iron skillet handle doesn’t extend upward. It sat at an angle and wouldn’t close to keep the heat in.IMG_7263

Eventually I turned over an air insulated cookie sheet that I received for Christmas (thanks Dad!) and put the warm tea kettle on top of it to keep it down. Definitely not the most elegant solution but it certainly worked.

I also threw my camera on the ground during this process, trying to take a quick picture. But that’s another story, nevermind. Anyway. Your father cried and… Have you all seen Into the Woods yet? No? Then moving on.

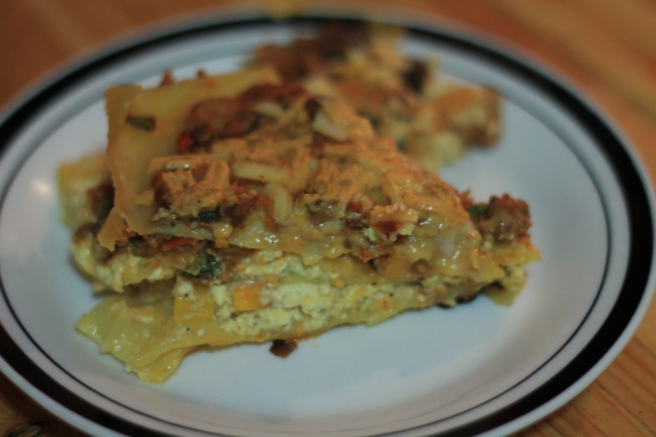
I quite enjoyed this meal, it gave me three more meals, and I’ll make it again. I think you should try it.Lah-Zan-Ya!

Have you made a lasagna like this? Have you made this one? If yes to either of these, comment below and tell me about it? Did you make other substitutions? Did you hate it? I want to know!

Also, if you have a recipe you’re not sure about and want someone else to make it first, I’m taking requests. Let me know and I’ll try to make it happen!

Be Healthy,

-Peter

.

Roasted Brussels Sprouts

I wanted a quick and tasty vegetable tonight: Perfect!

Recipe:

Brussels Sprouts Recipe

Added Ingredients:

Nutritional Yeast

Mozzarella Cheeze

Procedure:

Prepare this just like the recipe says, omitting the Parmesan and (oh shoot, I just realized that I forgot this) the balsamic vinegar. I’m sure that would be great, but I didn’t add it.

Add 1-2 tablespoons of nutritional yeast when mixing all together before baking.

Before your final turn of the sprouts, when you think they look just about done, sprinkle a little bit of Mozzarella cheeze, maybe one tablespoon, onto the top to let it melt and mix in. Cook for an additional 1-2 minutes.

Stir and enjoy!


My Story:

I was headed home late tonight after a meeting and wanted to pick up something healthy to toss together for dinner. I wandered around the grocery produce section until Brussels Sprouts caught my eye. When I was younger I was never too excited about them; maybe that was because people always talked about them being gross, but I never really remember even tasting them! (I also never knew there was an ‘s’ at the end of Brussels, but the idea that it probably originated in Brussels clarifies that question for me!)

Flash forward to a few months ago when I saw them on sale and decided “what the heck!” They were quite tasty! I’ve had them a few different ways now, but I think I like this one the best. The nooch gives it a nutty flavor that complements the sprouts well and the cheeze… well, if you’ve been following my blog recently you know that I’m adding cheeze to many dishes. (And yes, I’m using the ‘z’ in that word to differentiate between dairy cheese and vegan cheeze.) Believe me, though, if you don’t go overboard on the cheeze, it’ll be quite tasty.

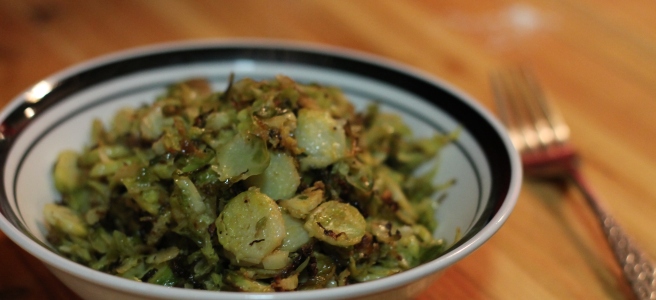
IMG_7075Brussels Sprouts!

Now, the recipe says it will serve three to four people. In my opinion, it serves one. My bowl is clean, completely. I’ll definitely be making this recipe again. It’s a fairly light, warm, and delectable dish that will always make me clean my plate.

Anybody like Brussels sprouts? If you don’t (and somehow found this page by mistake), I say try it anyway and let me know! Have another favorite way to cook ’em up? let me know in the comments and your recipe just might be featured down the line!

Be on the lookout for a dessert, a breakfast, and a vegan staple coming up in the next few days.

As always, thanks for reading!

-Peter

Green Beans and EB Mac&Cheese!

Tonight I threw something together to save some time, but it was pretty tasty!

Recipe:

Ingredients:

For the Mac&Cheese:

Earth Balance Vegan Mac and Cheese (Click for link)

2-3 tablespoons Nutritional Yeast

1/4 to 1/2 teaspoon Garlic Powder

1 tablespoon Dijon Mustard

Small handful of Vegan Mozzarella (I used Follow your Heart brand)

1-2 tablespoons Bread Crumbs

For the green beans:

PF Changs Spicy Green Beans (Also click for link!)

For this, I used thai chili peppers rather than the flakes it suggests. I just diced three or four them and threw them in.

Procedure:

Make the mac and cheese according to the package until you drain the pasta. Okay, so that’s just boiling the pasta.

Correction: Boil the pasta. While that’s happening, start on the green beans. I got everything chopped, the sauce put together, and cooked the first pass of the green beans (the steaming) before my pasta finished. Then get on that cheese sauce!

Two tablespoons vegan butter into the pot, let it melt, then add four tablespoons vegan milk, and then the cheese powder! You’re going to whip up a creamy sauce before adding the noodles back in. Add the nooch, the mustard, and the garlic powder. Stir it all together and let it thicken. Add the pasta back in and cook that for a few minutes until the pasta is just starting to stick to the bottom of the pan. This will keep it thick and creamy. Scoop it into an oven proof bowl or baking dish and add a sprinkling of mozzarella cheese on top, the breadcrumbs, and a grind or two of black pepper. Set your oven to High Broil and toss it in. Keep a close eye on it- you want it to brown and crisp, not burn and char.

While that’s browning to perfection, finish the green beans. Then eat!


My story:

As we all know, mac and cheese has been a long time favorite. Yada yada yada. I liked the Earth Balance brand, but I felt like it needed something else. Last time I made this, I threw some of the extra ingredients in but didn’t bake it, and I thought it turned out well! I think the final touch was adding that crispiness on top. Next time I make it, though, I think I’m going to actually bake it at 350° for fifteen minutes to get the inside matching a bit more. Maybe I’ll add some mozzarella in with the sauce too!

IMG_6934

A side note: with this recipe, I didn’t measure anything. The butter, the milk, the soy sauce, nothing. I made approximations. As for the additions to the mac, I added new things and then approximated what I had added. I think the way to get better at cooking is to try things and not be afraid of what might happen. That’s not to say that half a cup of garlic powder would be the best idea, but I guess you could try it! I hope you’re making your own variations to my recipes too!

As for the green beans, I was looking for a recipe I’ve used in the past but couldn’t find it in the first fifteen seconds (not that I’m impatient or anything. At all.), so I tried a new one. I’m not sure it was my favorite. The taste was fine, though the chili flavor was maybe a bit overpowering, but the texture wasn’t how I imagined it. I’ll try to find that other recipe and get back to you sometime with one I really like.

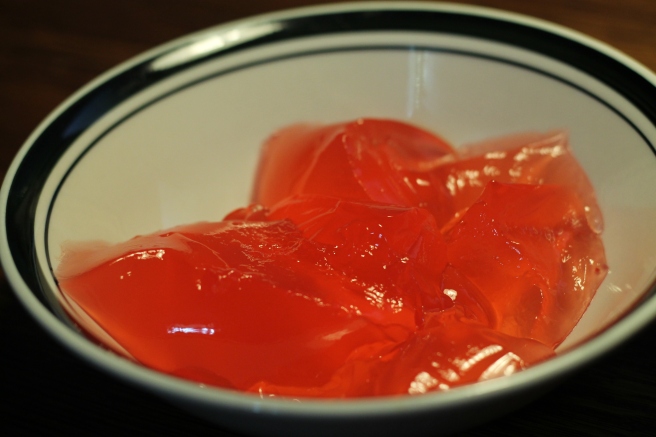
AND ALSO: if you went vegan, did you feel like you were giving up Jell-o? If you didn’t go vegan, do you feel like you’d miss Jell-o? You’d just have to put up with Agar Agar and hope for the best? (Not to knock Agar, I just haven’t had the best experiences with it yet. Here’s hoping for the future!) I’m here to tell you that your days of Jel Desserts are not over. I found a version that I’m liking! Thanks to my friend Noel, I’ve experienced something that is awfully close! The brand is Naturally Delish- give it a shot sometime.

Jel Dessert!

Have you tried a new mac&cheese recipe? (You’ll see this question a lot.) I want to hear about it! And let me know if you try this one! Throw something my way in the comments section.

Hey. Thanks for visiting.

-Peter

Kale Chips Anyone?

A quiet evening at home with my kale chips.

Recipe:

Ingredients:

1 bunch kale

2-3 tablespoons coconut oil

Salt

Pepper

Garlic Powder

Nutritional Yeast

Preperation:

Preheat your oven to 275°.

If it’s cold where you live and your house has no insulation, your coconut oil will have solidified (not that this has ever, ever happened to me). Put it in an oven proof dish and toss it in the preheating oven while you take care of the next steps.

Cut the leaves off the stalk of the kale and wash thoroughly.

This part is important, from what I’ve seen: Dry your kale. I like using a salad spinner but you can also take care of this with a kitchen towel or two. When it’s dry, toss it in a large bowl.

Add spices to your liking. I usually add about two tablespoons or so of nutritional yeast, a teaspoon of garlic powder, half a teaspoon salt and a couple grinds of fresh pepper. Then pour the coconut oil over the top (careful, it’s hot if you just took it out of the oven!) and mix it all with your hands. Be sure to get the oil on both sides of each leaf! When you’re satisfied, lay out the kale individually on a baking sheet or two. Toss these in the oven for eight minutes. At this point, take them out and turn them around to make sure they cook evenly. When I’m doing two sheets full,  usually swap their places in the oven too. Set the timer for three minutes, and then touch a few chips on each sheet to see if they’re crispy yet. Keep checking every minute or so, it can happen fast! I’d say it’s worse to be slightly overcooked than slightly undercooked, because you lose the taste if they’re burned.

Eat them. Probably off the tray. If you’re fancy and trying to take pictures for a food blog, put them in a bowl. That’s the only time it’ll happen.


My story:

I’ve been making Kale Chips for a couple of years. For me, it’s a great excuse to heat up my kitchen in the winter where it’s usually in the 30s.

My Coconit Oil

There. I just gave you a cost effective heating solution. Your oven is on at a low level, but it’s all for sustenance! Keep the doors closed so the kitchen gets nice and warm- you won’t be disappointed.

Fresh KaleJust the leaves!Dried!Prebake!Post Bake!

Kale Chips

I suggest trying different flavors on your kale chips. I’ve done paprika (particularly a bourbon smoked paprika from a spice shop in a neighboring town- delicious!), onion powder, vegan mozzarella, a little bit of sugar and balsamic vinegar, swapped out the coconut oil for olive, you name it. You can do google search for kale chip flavors and you’ll get an incredible mix. I’ve settled down with these for a while now and I’ve been pretty happy with them. When I do try something new, I like to mix half a batch of my normal chips and then add new ingredients so that I’ll always have a fall back.

(Also, on flavorings, tonight I didn’t add quite enough nooch, which became apparent when I was laying them out on the sheet, so I sprinkled more on before popping onto the oven- worked like a charm!)

In regards to the mixing by hand; I know some people might not like this part. In fact I’ve made these with a friend and she’ll do any other part of the prep except this. I sure hope that next time she makes them she’ll have someone to help because I’d say it’s the best way to make sure the kale gets coated in all sides with both the oil and the flavorings!

Tonight I had this along with some of that roasted beet pasta I made the other night. I usually find that the best way to reheat pasta (for my tastes) is in a frying pan with a little bit of oil. Skip the microwave if you want the consistency to be similar! Also, I like to brown bits of it to change up the texture. (This doesn’t go for casseroles or the like though, just to throw out there.)

Have you tried other kale chip flavors? I know there are a lot out there and this is a bit generic, but I’d love to hear from you  so I can try new ones next time! Let me know in the comments below!

-Peter

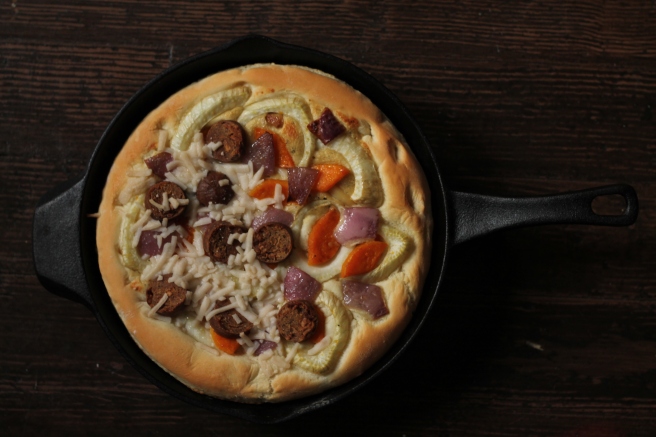
Fennel and Butternut Squash Pizza on Focaccia!

Today I used some groceries given to me to create something new without a visit to the grocery store! Always exciting.

Let’s get started!

Recipe:

1 recipe focaccia bread  (find it here: http://www.crunchycreamysweet.com/one-hour-skillet-focaccia-recipe-card/)  See note below.

1 bulb fennel

1 small butternut squash

1/2 small red onion

Olive Oil

(Additional pizza items if preferred- I used a Tofurky Chick’n and Apple sausage, a leftover spoonful of the garlic sauce from this recipe:  http://www.veganricha.com/2014/09/buffalo-chickpea-pizza-white-garlic-sauce-celery-ranch-vegan-recipe.html, Follow Your Heart Mozzarella cheese, and roasted garlic.)

To prepare:

Chop fennel into 1/2 inch slices. Peel butternut squash and cut off at base. We’ll be using the top half, so save the round for a future use (I just gave you license to make another squash dish! Be excited!) and slice into 1/2 inch slices and then chop how you like, I made multiple sizes for variety (see the photo). Chop the onion into inch squares.

(A note about sizes- don’t stress. I don’t know what I’m talking about, cut them how you want to! Just try to make sure they’re vaguely uniform.)

Follow the recipe for the dough. While it’s in the oven the first time, toss the squash in a skillet and cook with a tablespoon of olive oil for five minutes. Add the fennel and onion, and saute until soft, about 10-15 minutes.

When your dough has risen, pull it out of the oven and press down in the center area, forming a crust around the edges. Lightly coat in olive oil and layer on your toppings. Toss in the oven and cook for 15-20 minutes until the crust is browning and, well, it look like you want to eat it. Trust me, it won’t be long.

Eat it.

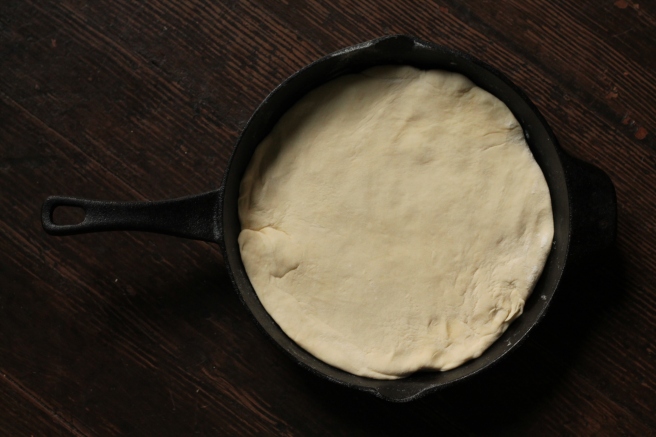
*Note: Consider splitting the dough between two pizzas. Mine turned out in a very deep dish style, which is great if that’s what you want, but if you’re accustomed to thin crust pizzas, it may be too much.


My story

So my mother ended up with some extra fennel yesterday and asked if I would like any. As I had just started this blog, I figured a new challenge would be good! She dropped it off along with some butternut squash and I started looking for ideas. The internet is certainly great for recipes! I saw some things on MinimalistBaker.com, BevCooks.com, and OhSheGlows.com, some of my favorite sites. I rolled some of these into one and there it was! An idea!

VeggiesCreate the dough!Lined DoughVeggies

I really think that the additions of garlic sauce, roasted garlic, and a dusting of cheese will give it more shape and add to the sweet licorice taste of the fennel and the creaminess of the squash. I ended up doing half garlic sauce and half olive oil, and then put cheese and sausage on half of each! It turned out quite well in that I was able to taste it every way. I’m not saying that I ate the whole thing in one sitting. I got up to refill my plate.

PreBake!Baked!

If I make this recipe again, I’ll definitely halve the crust. It was tasty, but probably a bit too much like bread with stuff on it and less like pizza. If you want a classic Bread ‘N Stuff, though, go full throttle. SlicesAlso, the whole dish could have benefited from some spices in there with the sauteed veggies. You’ll learn this about me- sometimes I go for basics in spices. I’m still figuring out what goes well together.

Well there’s my brand new, very own recipe! Well, mostly. Ignore that crust part and it’s all mine.

Try it yourselves! Anybody like Bread ‘N Stuff? Or a quick skillet pizza? Let me know what you think in the comments below!

-Peter

Green Pear Smoothie and a Mac&Cheese Review!

Hi all!

I Started the day off right with a tasty green smoothie!

Recipe:

Two handfuls of spinach

One banana

8-10 1-inch chunks frozen watermelon

1/4 frozen peach

1 pear (I used green anjou)

1 Scoop BodyLogix Chocolate Vegan Protein Powder  (http://www.bodylogix.com/canada/vegan-protein/)

Almond milk to taste

I always put the spinach in my blender first (unless I forget and put the banana in before that… like this time) so that it has time to blend up pretty well.

Smoothie Prep

Toss in whatever you can fit to start, add a bit of almond milk, and blend! Once it’s chopped up decently and takes up less space, throw in anything you couldn’t fit. (I’m using a Ninja, which has blades that take up a lot of space. If you have a blender with blades just in the bottom, you should have no trouble.)

I don’t have a Vitamix, but the Ninja does pretty well with spinach or kale if you give it enough time. Keep going until you’re satisfied with the smoothness! Add more almond milk to get the consistency to you liking, and BAM. Vegan smoothie.

Imagine this a bit more green, and that's it!

A word on the BodyLogix Vegan Protein Powder- I subscribe to VeganCuts.com (a really great way to get a sampling of vegan products for a great price delivered to your door every month-check it out!) and received a sample. This was the first one that didn’t end up grainy in my smoothies, so I’m sticking with it! I’ve only tried a couple of others, but so far I like this one best.


And for dinner…

Vegan Mac and Cheese

I didn’t have time to cook today- long drive out to the city, but I stopped at Whole Foods and Trader Joe’s (two places I have nowhere near me) and stocked up. While I was in Whole Foods, I came across a Mac and Cheese I hadn’t tried before. Now if you don’t know me, you’ll soon learn that I’m a sucker for trying vegan mac and cheeses. If I were to name one thing that I miss as a vegan, it would have to be Mac and Cheese. If I see one, I’ll usually pick it up and try it.

This is the review part. (Now you get the clever title of the blog, yeah? It’s showy, but also a review? No? Okay, we’ll move on.)

This is Candle Cafe’s Vegan Macaroni & Vegan Cheese. The coloring was pretty spot on in my opinion, the look and consistency were great! The taste was impressive for a vegan cheese. I wouldn’t go so far as to say it’s like dairy, but it’s pretty decent! There was a moment there where I forgot it was vegan, but I guess I wasn’t really thinking about it in the moment. But hey. Tasty nonetheless.

Here’s some more info about it: http://www.candlecafefoods.com/prod-macaroni-vegan.php

Well, that’s it for me today. I was gifted some fennel and butternut squash today, though. We’ll see what tomorrow holds in store.

Comment below if you’ve found a satisfactory Vegan Mac and Cheese or if you’re a Green Smoothie Consumer, I’d love to hear about it.

-Peter

Roasted Beet Mostaccioli (And the first post!)

Wow. My first post. I’ve been cooking for quite some time, but here it has finally begun- a Food Blog.

Before I get ahead of myself, here’s one thing I hope to always do.

Recipes used this evening:

http://bevcooks.com/2012/04/penne-pasta-in-a-roasted-beet-sauce/

http://detoxinista.com/2013/10/cashew-parmesan-vegan-paleo/

That way, if you want the recipes here at the top of the post without reading all my comments and thoughts, you got ’em. And if you want to read my stuff, it’s all below!

Well here we go. I had a couple of beets laying around. And some pasta. I looked up this recipe last night, trying to see if I could make it happen at ten pm and decided it would be a bad idea. Tonight was the night!

Lets get started. Be cautious of the words “cut into a small dice” when referring to the beets- Too small and they’ll look something like this:

Diced them a bit too small, perhaps, but the taste is all there!

Oh well! Tasty nonetheless.

As I write this, I’m getting up to get another bowl of this stuff. Hold on.


I’m back. More beety goodness. Back to business, and I’ll jump backwards in the story.

As you’re looking at the recipe, you might be thinking “Hm. That doesn’t look vegan.” I sure hope you are. Now check out the second recipe. Vegan parm. It might not be what the initial idea was, but it works and comes together all the same.

So, swap the Parmesan cheese for some good old vegan parm, and you won’t even have to wash additional dishes! Make the parm in your food processor (I used Roasted, Slightly Salty Cashews from Trader Joe’s instead of raw and it tastes fine to me!) and then take out half to make the sauce. I swapped the cream/milk for almond milk and left out the vermouth completely. I found that I needed more broth to get it thinned out, but not more than double.

Photos of the process!

Three simple bits to make some delicious vegan parm!

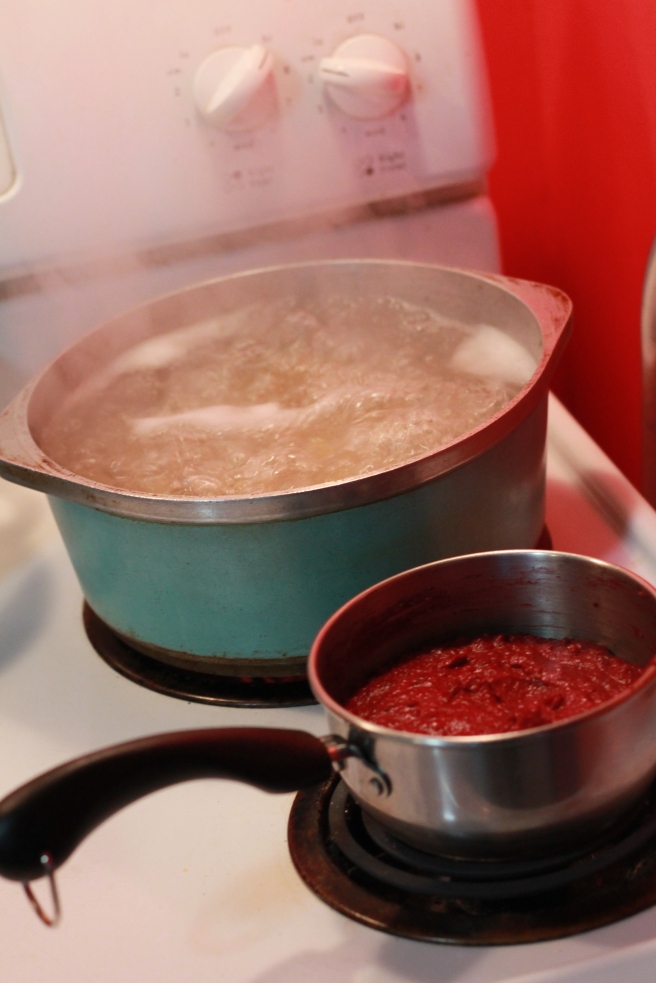
Sauce and Boiling Pasta

Pretty Pasta

I wish the red came through in the photo better!

Meal complete.

I’ll work on making these posts more interesting.

My first post and all I wanted to do was keep eating the pasta…

But I liked it this dish. I suggest you give it a shot! And feel free to comment.

-Peter